







Blog
How to Winterize a Water Pump Before Freeze-Up

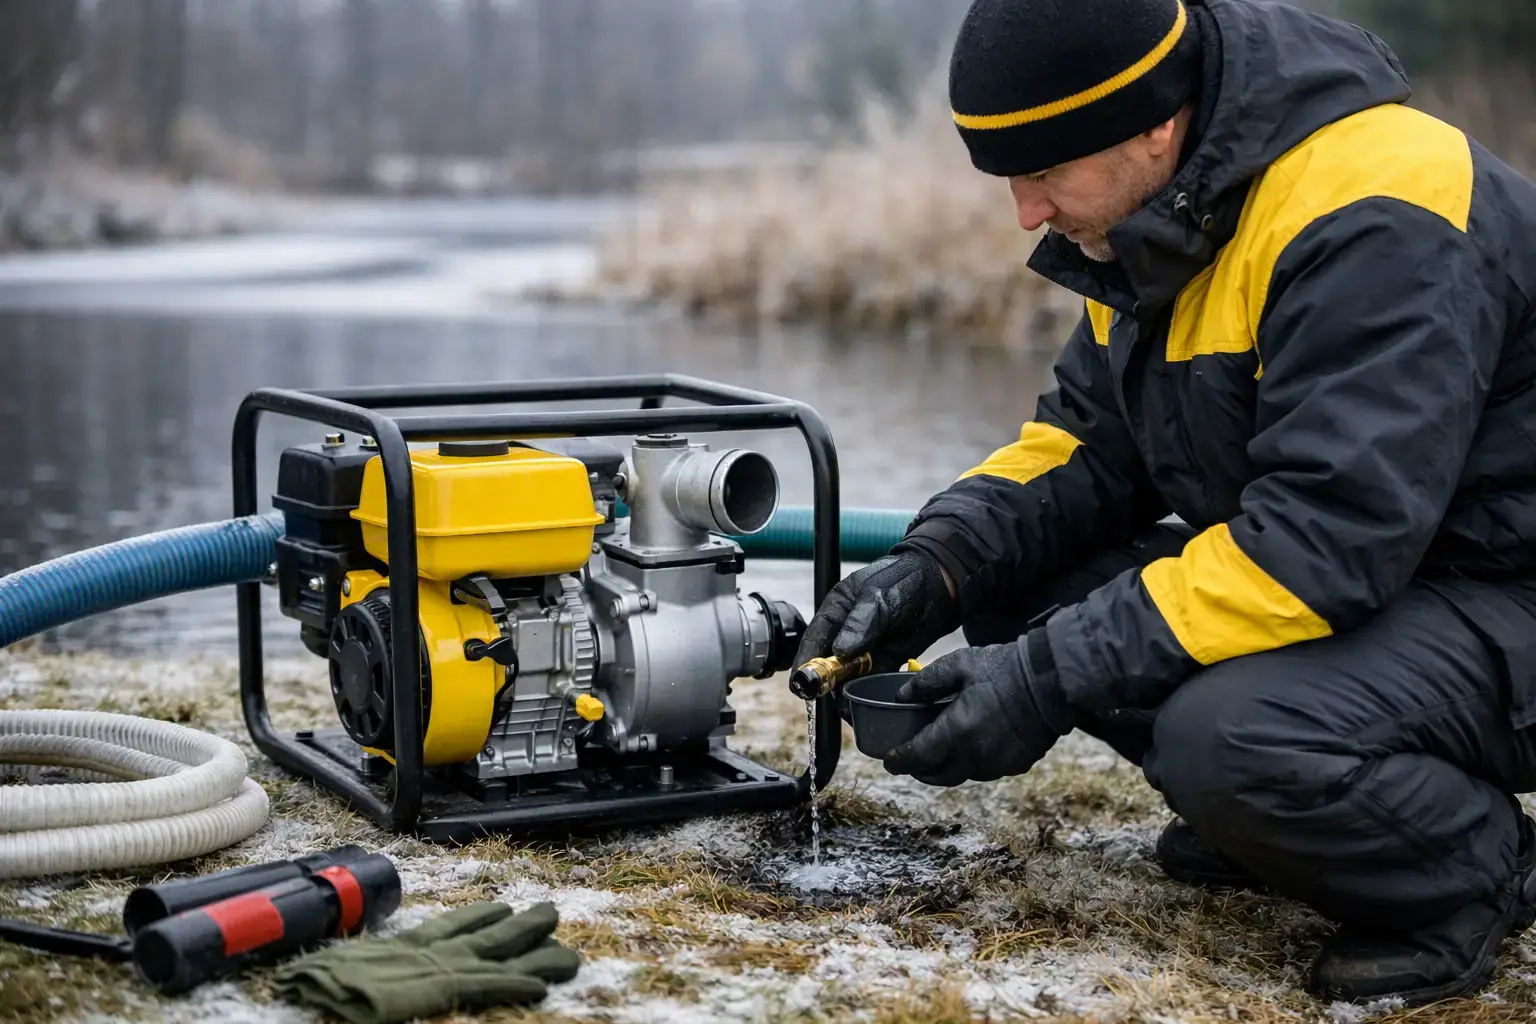
A single hard freeze can turn a ready-to-work water pump into a cracked housing, damaged seal, or seized impeller. If you are learning how to winterize water pump equipment, the goal is simple: remove trapped water before it expands, protect the pump from moisture and corrosion, and make spring startup predictable instead of expensive.
This job matters most for portable centrifugal pumps used for drainage, irrigation, ponds, basements, construction sites, and rural properties. A pump may look empty after use, but water often remains in the volute housing, suction port, discharge port, hose fittings, and check valve. That is enough to cause damage when temperatures fall below freezing.
Know what type of pump you are storing
Most portable surface pumps need active winterizing because their pump housing holds water after operation. This includes clear-water, trash, semi-trash, high-pressure, and transfer pumps. Engine-driven models also need off-season engine care, not just pump drainage.
Submersible pumps are different. A fully submersible unit can often remain in water if the water will not freeze solid and the manufacturer permits it. If you remove it for storage, clean it, dry the exterior, and protect the power cable and plug. Never assume every pump follows the same rules – the owner’s manual takes priority when it specifies a drain procedure, storage fluid, or temperature limit.
The condition of your water source also changes the work. Pumps used in muddy drainage, floodwater, or pond water need more thorough cleaning than pumps that only moved clean water. Silt left inside a pump hardens over time and can make the impeller difficult to turn next season.
What you need before winterizing a water pump
Gather a bucket or drain pan, clean rags, a soft brush, basic hand tools, and compressed air if available. For some units, non-toxic RV or marine antifreeze can be useful as an added layer of protection. Use only a product suitable for potable-water systems if there is any chance the pump or hoses will later be used around drinking water.
Do not use automotive antifreeze in a water pump. It is toxic, difficult to dispose of responsibly, and unnecessary for most seasonal storage jobs. Draining the pump completely is the first line of defense. Antifreeze is a backup for complex plumbing, low points that cannot be drained, or equipment stored where temperatures stay deeply below zero.
Before starting, move the pump to level, stable ground where drained water will not create ice near a doorway, driveway, or work area.
Step 1: Shut down safely and isolate the pump
Turn off the pump and let a gasoline engine cool fully. Close the fuel valve on an engine-driven pump. If the unit has an electric start, disconnect the battery negative cable if you will perform further maintenance around the engine.
For electric pumps, unplug the power cord from the power source first. Do not pull on the cable, and do not handle a plug with wet hands. Disconnect suction and discharge hoses only after the pump is off and pressure has been released.
Open any downstream valve or spray nozzle to relieve pressure. A pressurized discharge hose can kick or spill when you loosen a fitting, especially on high-head pumps.
Step 2: Drain every part that can hold water
Remove the drain plug from the lowest point of the pump housing. On many portable water pumps, it is located near the bottom of the volute casing. Remove the priming plug as well. Opening both points allows air into the housing so water can leave faster.
Tilt the pump carefully toward the drain opening after the main flow stops. Do not force the unit onto its side if fuel or engine oil could leak. Instead, lift only enough to encourage trapped water to run out while keeping the engine as level as possible.
Disconnect and drain the suction hose, discharge hose, strainer, couplings, and any check valve. Lay hoses on a gradual slope and walk remaining water toward the open end. A coiled hose can hide several cups of water in its low points, enough to split a fitting or damage a valve.
If your pump has a built-in check valve, inspect it closely. Water trapped behind a closed flap or spring-loaded valve is a common freeze-damage point. Remove the valve for cleaning if the design allows it, then store it dry.
Use compressed air with restraint
Low-pressure compressed air can clear lingering droplets from hose connections and passages. Keep the pressure modest and avoid blasting directly at mechanical seals, diaphragms, gauges, or delicate valves. The purpose is to push out residual water, not to pressure-test the pump.
If you do not have compressed air, leave the drain and priming ports open for several minutes in a dry place, then tilt the pump through a few positions. Time and gravity work well when the unit is properly drained.
Step 3: Clean the wet end before storage
Rinse mud, algae, sand, and debris from the pump exterior, strainer, and hose fittings. For a trash or semi-trash pump, remove the pump cover according to the manual and inspect the impeller area. Clear packed debris without prying aggressively against the impeller or wear plate.
A clean pump cools better, is easier to inspect, and is less likely to develop corrosion around fasteners and ports. Wipe the housing dry after cleaning. Check the inlet and outlet threads for damaged gasket material, grit, or cross-threading that could cause a leak at the next setup.
Do not store a wet pump inside a sealed plastic bag. Moisture trapped against metal parts encourages corrosion and leaves rubber components damp for months.
Step 4: Decide whether antifreeze is needed
For a basic portable pump that has been drained completely, storage fluid is usually not required. However, a small amount of non-toxic RV antifreeze is sensible when you cannot confirm that all internal water has escaped, when a pump is installed in a fixed system, or when temperatures regularly reach severe lows.
With drain plugs reinstalled loosely as directed by the manufacturer, pour the appropriate antifreeze through the priming port and rotate or gently tip the pump so it coats internal passages. Do not run the pump dry just to circulate storage fluid. Drain any excess and clearly mark the pump or its storage container so no one mistakes the fluid for usable water.
Come spring, flush the pump thoroughly before putting it back into service. This is especially important for irrigation, livestock, or household water transfer applications.
Step 5: Winterize the engine on gasoline-powered pumps
The pump housing is only half the job on an engine-driven unit. Old fuel is one of the main reasons a pump refuses to start after storage. Gasoline can degrade, leave varnish in the carburetor, and block small fuel passages.
For storage longer than a month, either drain the fuel system according to the engine manual or add a quality fuel stabilizer to fresh gasoline and run the engine long enough for treated fuel to reach the carburetor. The better choice depends on the manufacturer’s instructions and how long the pump will sit.
Check the engine oil level and change contaminated or overdue oil before storage. Inspect the air filter, spark plug, recoil starter, fuel lines, and mounting bolts. A quick inspection now is easier than discovering a cracked fuel hose during an emergency drainage job in spring.
Store fuel separately in an approved container, well away from ignition sources. Never keep a gasoline-powered pump in a living area, basement, or enclosed space shared with fuel-burning appliances.
Step 6: Store it where it will stay ready
Choose a dry, sheltered location with stable temperatures where possible. Keep the pump off bare concrete by placing it on a shelf, pallet, or mat. This reduces moisture contact and protects the unit from accidental impacts.
Cover the pump with a breathable fabric cover or clean sheet. Avoid tightly wrapping it in plastic, which traps condensation. Keep drain plugs and priming plugs with the pump, ideally in a labeled bag secured to the frame, so the unit is complete when work resumes.
If you store the pump in a shed, workshop, or service vehicle, keep rodents in mind. They can damage wires, recoil cords, foam air filters, and soft hose materials. A clean storage area and periodic visual check prevent many unpleasant surprises.
Before the first spring start
When freezing weather has passed, reinstall the drain and priming plugs with good seals. Inspect hoses for stiffness, splits, and damaged clamps. Add fresh fuel if applicable, check engine oil, prime the pump with clean water, and test it close to a drain before taking it to a remote job.
Watch for leaks at the casing, fittings, and mechanical seal during the first few minutes of operation. If the pump fails to prime, inspect the suction hose, strainer, gasket, and check valve before assuming the pump itself has failed.
A properly winterized pump is not just protected equipment on a shelf. It is drainage capacity, irrigation capability, and emergency water movement ready when the next season starts.
