





Blog
How to Prime Water Pump Systems for Reliable Flow

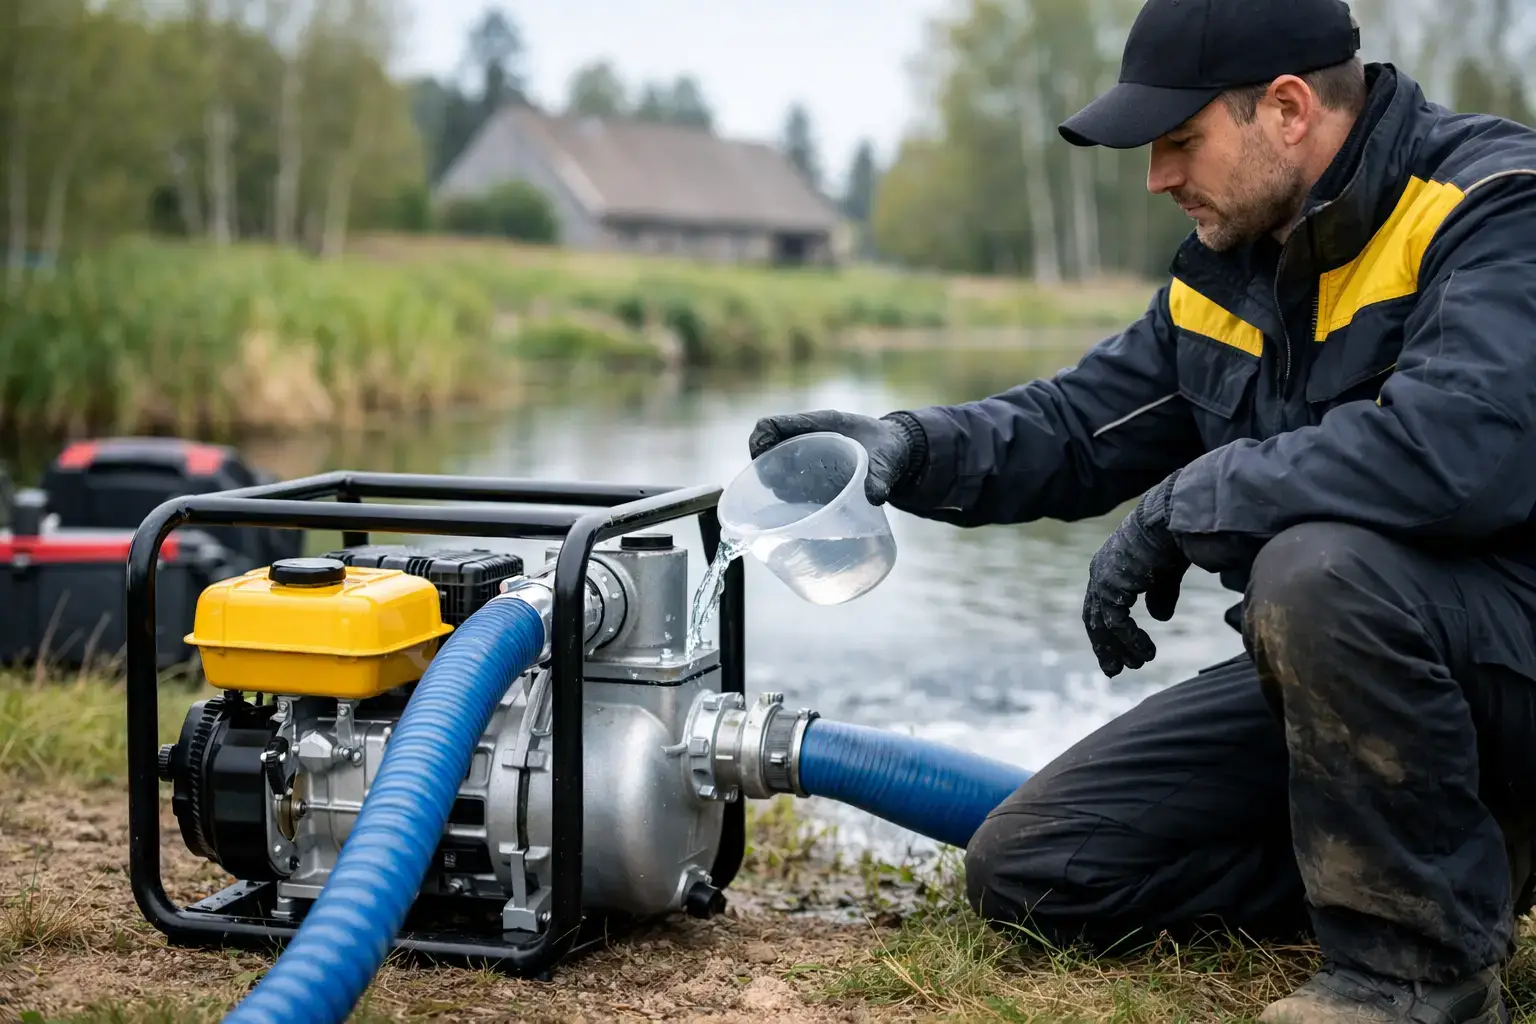
A pump that starts but delivers no water is usually not broken. It is often full of air. Knowing how to prime water pump equipment correctly gets water moving, protects the mechanical seal from dry running, and prevents a simple drainage or irrigation job from becoming a repair bill.
Priming means filling the pump casing and, in many setups, the suction hose with water before starting the engine or motor. A centrifugal surface pump cannot create a strong enough vacuum to pull water through an empty line filled with air. It needs water inside the casing first to create suction and lift water from the source.
This process applies to most portable gasoline-powered transfer pumps, irrigation pumps, and drainage pumps that sit above the water source. A submersible pump is different: because it operates underwater, it normally does not need manual priming.
Before You Prime a Water Pump
Stop the pump and let a hot engine cool before opening the priming cap. Place the machine on firm, level ground as close to the water source as practical. A shorter suction lift is easier on the pump and improves flow.
Check the suction side before adding water. Priming will not solve a split hose, loose clamp, damaged O-ring, or leaking fitting. Even a small air leak can stop the pump from lifting water, although no water may leak out of the connection. The suction hose must be reinforced and rated for vacuum use. A regular lay-flat discharge hose can collapse under suction and should not be used on the inlet side.
You will generally need:
- Clean water for filling the pump casing
- A correctly sized reinforced suction hose
- A suction strainer with a foot valve, where the setup requires one
- Hose clamps and the proper sealing gaskets or O-rings
The strainer keeps stones, leaves, and debris out of the impeller. A foot valve is especially useful when drawing from a well, tank, pond, or riverbank because it holds water in the suction line after shutdown. That makes the next start faster and reduces repeated priming.
How to Prime Water Pump Step by Step
1. Set the suction hose correctly
Connect the suction hose to the pump inlet and tighten the clamp securely. Confirm that the inlet gasket is present, clean, and seated correctly. Put the strainer end into the water and keep it fully submerged.
Do not let the strainer rest directly in mud, sand, or loose gravel. Raise it slightly off the bottom with a block, bucket, or secure support. Sediment can clog the strainer, wear the impeller, and reduce performance over time.
Keep the suction hose as straight and short as conditions allow. Avoid sharp kinks, high loops, and unnecessary adapters. Every restriction increases resistance, while every extra fitting is another possible place for air to enter.
2. Open the priming plug
Locate the priming plug or cap on top of the pump casing. On most portable water pumps, it is a threaded plug near the discharge outlet. Remove it carefully. If the pump has been running, wait until it is cool enough to handle safely.
Check the plug and seal before reinstalling it later. A worn seal can admit air during operation and cause loss of prime. Replacing a small gasket is far cheaper than troubleshooting a pump that will not hold suction in the field.
3. Fill the pump casing with clean water
Pour clean water into the priming opening until the casing is completely full. Do not stop after adding a small amount. The goal is to fill the volute around the impeller so the pump can begin moving water immediately.
On a new installation with a long suction line, the water level may drop as water works its way into the hose. Continue filling until the casing stays full. If the hose has a foot valve, it should retain this water. Without one, a long or elevated suction line may drain back toward the source and require more time to prime.
Dirty water from the ditch or pond may work in an emergency, but clean water is the better choice for priming. It helps prevent grit from entering the seal and impeller before the pump is even running.
4. Reinstall the plug and prepare the discharge line
Tighten the priming plug firmly by hand or according to the pump manual. Do not overtighten a plastic plug or damage its threads. Make sure the discharge hose is connected and routed where the water needs to go.
For drainage work, keep the discharge end clear and secure it if high flow could cause it to move. For irrigation, avoid pinching or sharply bending the hose. Back pressure and hose restrictions reduce output and can make a properly primed pump appear weak.
5. Start the pump and watch for flow
Start the engine or motor following its normal cold-start or warm-start procedure. Let the pump run at low to moderate speed briefly, then increase speed as needed for the job. Water should normally begin reaching the discharge side within seconds to a few minutes, depending on hose length and vertical lift.
Do not leave a pump running dry while you wait. If water does not arrive promptly, stop it. A dry-running pump can overheat the seal and internal components quickly. Recheck the water level in the casing, the suction connection, and the strainer position before trying again.
Why a Pump Loses Prime
A pump that worked yesterday but will not draw water today usually has an air leak, a blocked inlet, excessive lift, or a failed foot valve. Start with the simple checks. Make sure the water source has not dropped below the strainer, and inspect the strainer for weeds, leaves, ice, or sediment.
Then inspect every suction-side connection. The inlet fitting, hose clamp, gasket, adapter, and priming plug all need to seal tightly. A discharge-side leak is messy, but a suction-side leak is more serious because it lets air in without showing obvious water loss.
Vertical lift matters as well. Surface pumps have a practical suction-lift limit. While atmospheric pressure sets a theoretical limit near 33 feet, real-world performance is lower because of hose friction, water temperature, elevation, pump condition, and fittings. For dependable field use, keep the pump as close to the water as possible rather than expecting it to pull from a deep source.
Cold weather adds another complication. Water left inside a pump can freeze, crack the housing, damage fittings, and force the unit to lose prime. Drain the pump casing and hoses before storage when freezing temperatures are possible. This basic step protects equipment that may be needed urgently during a storm, flood, or remote job.
When Priming Is Not the Real Problem
If the casing is full, all fittings are sealed, and the pump still does not move water, do not keep restarting it blindly. The impeller may be blocked or worn, the hose may be collapsed internally, or the pump may be undersized for the required head and hose distance.
A trash pump handles solids better than a standard clear-water transfer pump, but it still needs the right strainer and sensible setup. For muddy excavation water, floodwater, or water carrying debris, choosing the correct pump type matters as much as priming it correctly. For clean rainwater transfer or irrigation, a clear-water pump may provide better efficiency and cleaner operation.
Champion Baltics customers who keep a portable pump ready for property drainage, fieldwork, or emergency water transfer should also keep basic service items on hand: inlet gaskets, hose clamps, a clean strainer, engine oil, and a spare spark plug for gasoline units. Readiness is not just owning the pump. It is being able to start it, prime it, and put it to work when conditions are against you.
After the job, let the pump cool, drain the casing if freezing is possible, and rinse off mud or debris. The next time water is rising where it should not be, a clean pump and an airtight suction setup will matter more than extra horsepower.
